Excel to AutoCAD layers

I have been attempting to update our office’s layer system. This would be difficult to do in AutoCAD without resorting to LISP or some programming to insert layers on mass. Creating lots of text on mass is really easy to do in Excel so that would be the program of choice to do this task.

The problem then comes of getting these layers into AutoCAD? There are numerous Lisp programs around on the internet to do this but what if you have AutoCAD LT only (as it lacks programming APIs)?

You can use Excels powerful cell commands to convert your layer list to a format that will then be able to create a script file. Below I will go through the steps you need to do to get this to work. (Note this is not my concept but I cannot find the original page where this was proposed).

Firstly create a blank Excel document.

Then place “-LAYER” in the 4th column over.

Now we are ready to input some data into the first three columns. This is in the order, layer name, colour, linetype. Make sure the second column for colour is text only to avoid any true colours being converted into numbers.

One completed we will now enter the following command below the cell with -layer in.

=IF(ISNUMBER(SEARCH(“,”,B2)),”N “& CHAR(34)&TRIM(A2)& CHAR(34)&” C T “&TRIM(B2)&” “& CHAR(34)&TRIM(A2)& CHAR(34)&” LT “&TRIM(C2)&” “& CHAR(34)&TRIM(A2)& CHAR(34),”N “& CHAR(34)&TRIM(A2)& CHAR(34)&” C “&TRIM(B2)&” “& CHAR(34)&TRIM(A2)& CHAR(34)&” LT “&TRIM(C2)&” “& CHAR(34)&TRIM(A2)& CHAR(34))

This creates the magic that is script. (Note the quotes are required for layer names with spaces).

Add layer information down the left and drag the little square in the bottom right of the excel cell to copy this to all cells below.

Once completed, save this file for future reference.

Copy the entire column of D and paste to a new file using paste values only.

Now the file is ready to become a script. Save as Formatted Text (space delimited) PRN file.

You should now have a text file that has the entire script for making your layers you need in it. Two steps to go!

Firstly we are going to rename the extension on the file (if you cannot see extensions follow this). This needs to be renamed from myscript.prn to myscript.scr.

Then open the file and add a return at the very end to create another line. This will terminate the last command and thus end the script.

Finally we load the script into AutoCAD using the command “script“.

Voila, all the layers are now in AutoCAD.
Macros – More Advanced

In my next post on customisation I will be looking at more advanced macro writing. After this post there will be a few individual macro examples which should be helpful!

Please refer to my macro basics and other customisation tutorials first.

In this tutorial I am going to refer to two UCS commands I have written to get around the lack of easy plan rotation in AutoCAD LT. In full AutoCAD you get a rotation box in the upper right corner that looks like the one below. This is unfortunately not available in LT.

Rotate from Viewcube

These are a bit more automated version of the tutorial I have posted before as I decided that even that was too much effort!

—–

The first macro rotates the UCS back to world and takes the plan view with it. This avoids the need for UCS follow being set to 1 and the annoying zoom extents bug it has.

^C^Cucs;w;plan;w;

So lets break down the macro above. Its just a simple chain of commands to do with the UCS and PLAN.

  • The first ^C^C at the beginning is escape twice to ensure that the command line is clear
  • Then the UCS command is started
  • Then the UCS command is told to reset to (W)orld
  • Then the PLAN command is started
  • Then the PLAN command is told to reset to (W)orld

Now the drawing is viewed in world view and the UCS is orientated the same way.

——

The second macro rotates the UCS to an object and then updates the view to suit.

^C^Cucs;ob \plan;c;

So lets break this one down as it has something slightly different in its layout.

  • The first ^C^C at the beginning is escape twice to ensure that the command line is clear
  • Then the UCS command is started
  • Then the UCS command is told to select by object
  • Then the script waits for input by the use of a space then a backslash
  • Then the PLAN command is started (after input)
  • Then the PLAN command is told to update to the (C)urrent

——

This formula can be used to make further buttons to emulate the plan rotate found in full AutoCAD or make any chain of commands work.

A quick way to create a macro is to run a command and follow the command line and write down your inputs and once you have completed the command you have the basics for putting together a macro.

—–

Lets make a macro to rotate the UCS and PLAN to the right. Here is a copy of the command line and below that is a list of the command inputs and then the resultant macro.

Command line:

Command: UCS
Current ucs name:  *NO NAME*
Specify origin of UCS or [Face/NAmed/OBject/Previous/View/World/X/Y/Z/ZAxis] <World>: z
Specify rotation angle about Z axis <90.00>: 90
Command: PLAN
Enter an option [Current ucs/Ucs/World] <Current>: c
Regenerating model.

Command input only:

ucs
z
90
plan
c

Macro:

^C^Cucs;z;90;plan;c;

Advanced dimensioning

This tutorial follows on from the dimension style basics one.

One of my colleagues was wanting dimensions that show a half (.5) after the measurement for when setting out brick diemsnions but not wanting the dimenions to have point something (e.g. 0.34 or .0) after them. And another wanted km dimensions. I will explain how to do both of these here.

Trailing Zeros

So lets alter the new dimstyle created in that post, called Adams – 1_100.

If we go to the primary units section,  change the precision to 0.0 and the round off to 0.5, this will allow the dimension to only present halves of numbers and not other fractions. All dimensions will now look like this: 1000.0 or 1020.5.

In order to remove the .0 for dimensions that do not require it, check the trailing zero supression box and now dimensions will look like this: 1000 or 1020.5.

km from mm

For example if you draw in mm and want to present the dimensions in km, again go to the primary units tab and add km as a suffix and change the scaling to 0.000001. This is the conversion factor from mm to km. Now the dimensions will only display km. As the precision is not required at that scale I would change the precision to 0.0 and add zero supression. 

I would suggest creating a new dimension style when altering the dimension this drastically.

Dimension style basics

This tutorial follows on from the text style one.

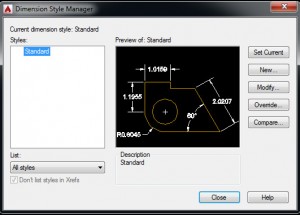
So once you have created you default text style (NOT STANDARD), click on the annotation panel again and go to the dimension style editor.

Default dimension style

You will get a similar box to the text style dialog, albeit the preview has moved from bottom left to the centre! However the principals are the same. Again, please do not use standard.

So, click on the new and you will get a box, give the dimension a name. Again, similar to the text style, give it a name that reflects where it came from and what it does, e.g. ‘company name – 1:100’ (metric), or ‘company name – 1/8″=1’-0″ ‘ for imperial.

Create new dimension style

You should note that AutoDesk being totally dumb have excluded pretty much every symbol that describes an imperial or metric scale. So the above two examples have to be re-written to make sense but won’t actually follow standard notation.
– company name – 1_100 (metric)
– company name – 1_8_-_1-0 (imperial)

Unsupported Characters

Again, this is only a suggestion of how to put it together, just keep it simple to allow others to get what the style is to be used for!

I am going to use metric for this example, however the principals will be the same for imperial.

So once you have entered the name, you will be presented with the (rather complex) dimension style editor box. This is a very powerful set of rules that can present dimensions however you want, some of the features are:
– rounding of dimensions
– scaling to other units, e.g. if you draw in mm, the dimstyle can display km!
– zero supression at both end and beginning
– location of text
– style of leaders
– style of lines and more!

The first tab to the left is lines, we will come back to that one. First lets set up the text.

Text

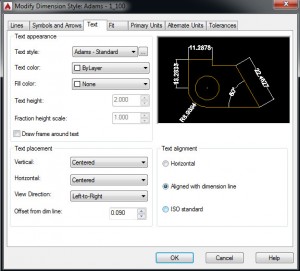
Text tab, dimension style

Change the text to the text style you created, this hopefully won’t grey out the text height in the dimension style. If you altered the text style height to anything other than 0, you caa change the height in this box, I usually use 2.

I like my dimension text to be centred and aligned to the dimension line.

When looking at the numbers on all the the tabs, they will be point something. This is because the defaults are set up for imperial. If in doubt change these to 1 for metric. Sometimes a 0.5 or 2 might be more suitable. A little playing with the numbers after creation will get the dimension style looking as you want it.

Lines

Line tab, dimension style

After the text is setup, lets look at lines. The default for this page is everything set by block. If you, like I, draw using layers, then change all “ByBlock” to “ByLayer”.

I also like to make my lines a little fancy by changing the extension lines to a grey (that plots light in colour) and to “hidden” to provide an unintrusive dashed line back to the origin points.

Don’t forget to change the spacings to 1.

Symbols and arrows

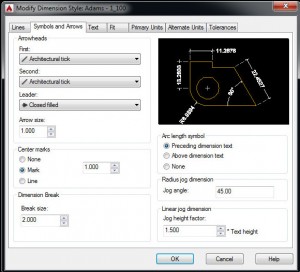
Symbols and arrows tab

Most of the settings on this page are personal preference. I prefer architectural ticks on my dimensions and a little arrow on my leaders.

I found from experince that 1.5 for arrow size seems to work quite well, center marks at 1 and a break size of 2.

Fit

Fit Tab
Fit Tab

This one is where the overall scale (if not annotative) is set. Once one dimension style is set up, it can be copied at the “use overall scale” section changed to suit the scale. e.g. here we are going to change the overall scale to 100 for a 1:100 dimension style. If 1:50 change this to 50.

The rest of the options in this section I leave at default.

You will notice that once the overall scale is changed the preview might go wild. If it does, just close and click your style and click modify.

Primary Units

Primary units tab
Primary units tab

This is where the precision and rounding is undertaken for the dimension style. You can also add suffix to the dimension.

Here I have altered the precision to 0.0 and changed the round off to 0.5 as precision greater than this is not normally required at 1:100. In fact you could change the precision to 0 and round off to 1 or even 5. Round off takes the dimension of say 3549.23435 (if measured using DISTANCE) and displays a more friendly number in the dimension. So if the round off was 5 and the precision 0, the dimension would read 3550.

Alternate Units and Tolerances

These are not generally used in architecture and for this tutorial the defaults will be left on these two tabs.

Text Style

As a small note in association with my another post of mine on trailing zero dimensions, I thought it would be handy to suggest how to set up a new text style.

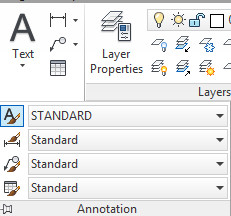
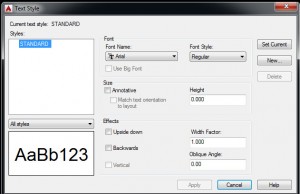
If you go to the Annotation panel under the Home tab on the Ribbon and click on the drop down you will get a list of current styles for text, dimensions etc. Click on the text style button and you will get the text style dialog box. This can also be found under the format menu or by typing STYLE.

Text style ribbon location

You will be presented with a STANDARD style in the box. PLEASE DO NOT EDIT THE STANDARD STYLE! I cannot emphasise this enough. If you copy and paste from one drawing to another where someone has edited the standard style, everything pasted will change, this includes dimenions based on the style etc. Just don’t do it!

Text style dialog box

So now, lets create a new style. I am going to call it Adams – Standard. Very orginal, but this should be descriptive or where it came from. Company name followed by a hypen and then sub-categories is a good way to go. E.g. ‘Adams – Standard’, ‘Adams – Dimensions’ (if different) or ‘Adams – title text’ are good places to start. For now everything will be based on one style to keep it simple.

Once you have clicked New, then entered the name, now we can change the settings. These are the defauly settings for the style. I am going to use Arial and leave it at normal.

Other settings include height, whether it is annotative (paper space height) or what angle it is at.

Most should be left alone:
– Height should be set to 0 if you are going to be using this style with a dimension style.
– Width factor should be set to 1, unless you want to have stretched out text (note this is not kerning but is just stretching the text).

New text style
New text style

Macros – Basics

In order to create custom commands and then assign them to a button in AutoCAD you will need to create a MACRO. This is so for all buttons, even those that call a LISP or OBJECTARX piece of code.

The MACRO is basically a list of the inputs on the command line listed out in one line.

A simple MACRO would look like this:

^C^Cplot;

This if turned placed in a button would bring up the plot dialog box.

The ^C^C is the code for pressing “escape” twice. This clears any active commands in case one is running.

The ; is the representation of enter. Any number of commands can be strung together into one MACRO.

MACROs also allow for input for selecting objects and this is written with a space and then a backslash.

I will be running through several of my custom commands to show how they are put together.

Unexplodable Blocks

One of my colleagues today posed the question, why doesn’t my block explode? Firstly, I thought this was impossible, but I was wrong!

The first issue is check that it is not a group, they are very similar on the surface and can be mistaken for blocks and visa versa! X or explode cannot work on groups.

However X or explode can sometimes not work on blocks. There is a setting for blocks that I had never noticed under the block creation box, called “allow exploding”, uncheck this and your blocks cannot be exploded!

In order to get around this, bring up the block edit dialogue with nothing selected.

Then select the offending block in the list and check the “allow exploding” box. Now click OK. Yes to redefine. Note this might cause some issues with placing!

explodeblock

Now the block can be exploded!


Fields of Polylines

I regularly need to obtain areas for floor plans in the projects I work on. I have always drawn a polyline and then looked at the properties palette and knocked off 6 decimal places to get the result. Then this is written down on a non-printing layer.

I was thinking, there has to be an easier way, especially one that updates the area when the design changes.

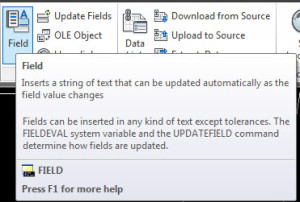
Well there is! Fields. To access this click on the insert tab and click on field. Or type FIELD.

Fields01

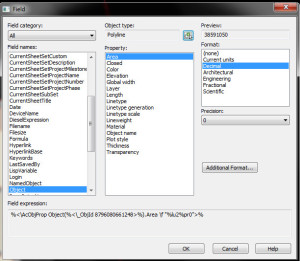
Once you click this button you will be presented with a large box with a list of fields that can be used within it.

fields02

Scroll down to object, in the second column there is a small button to select the object in question. Select your polyline. The box will now update to the properties of that object, here you can select “area” and the result will display in the last column.

fields04

Now you can click OK to place the field object wherever you would like it! Or you can alter the precision, or in my case I wanted the result in square metres and not square mm which is the default.

In order to change format or add suffices etc. click on Additional Format. Now you get another box wher you can alter the way the field is displayed.

fields03

I used a conversion factor to produce the square metre information required.

And that is it! You now have a value that alters when you change the polyline size. If it doesn’t update, try REGEN or click on update fields in the Data section of the Insert tab.

Topographical Survey 2D to 3D sketchup

Today I needed to take a 2D survey and create a landscape in Sketchup.

I had the elevation data in the autocad file but it was in metres (I work in mm) and was just text, it had no Z axis data.

Original Survey Points

So I needed to get AutoCAD to generate the Z data from the text. However the text was in metres, so first needed to convert it to mm.

Using the Find (and Replace) command I searched the text for the dot or fullstop between the two numbers e.g. 84.51 and replaced it with nothing. So the text became 8451.

All it needed now was the trailing zero. That was easier said than done! I tried several text replacement applications, one was freeware and was completely useless as it required registration and the demo was limited to a small number of items. Others refused to work and some seemed to only work on mtext. Eventually I found one that works a charm, thanks Tharwat!

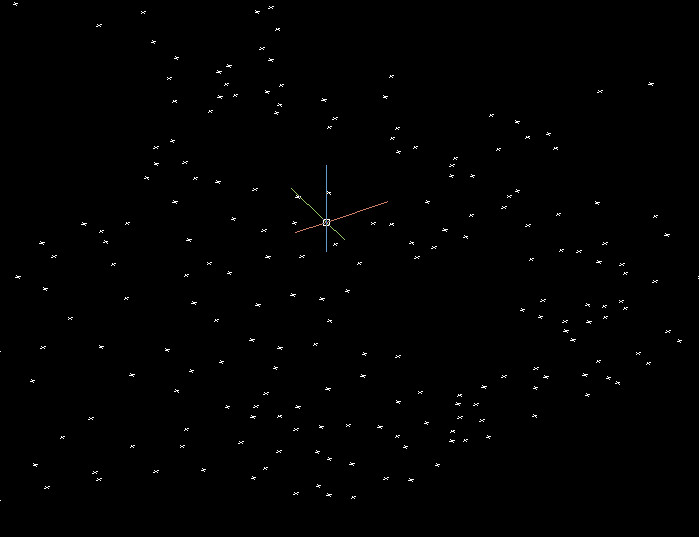
So now I had a load of text and blocks without any other data. There are a couple of lisp routines I found to assist with adding the Z data. One extracts the data into a text file (I found that I could not manipulate that data as point cloud in AutoCAD so I dismissed it) and the other takes the insertion point of the text (slightly out from the actual survey point but suitable for my needs). They are pntconv.lsp and Txt2pnt.lsp respectively.

I used quickselect to remove all the blocks and was left only with the text.

Then I ran txt2pnt.lsp, and selected all the text, for some reason it did not like that and only create some points. So I ran the lisp several times selecting smaller groups and that worked.

Viewing the point cloud in 3D there were a few stray points that I removed. Also I removed the original text to create a “pure” point cloud.

Now I had a point cloud that I could bring into Sketchup.

Survey Point Cloud
Survey Point Cloud

For this you will need points_cloud_triangulation.rb and the other Ruby file delauney2.rb which the first needs. delauney2.rb is available from Sketchucation. However the file needs renaming to delaunay2.rb when placing into the plugins folder (but works).

Then import the drawing into Sketchup, select all the points (make sure they are exploded) and run the plugin points_cloud_triangulation.rb!

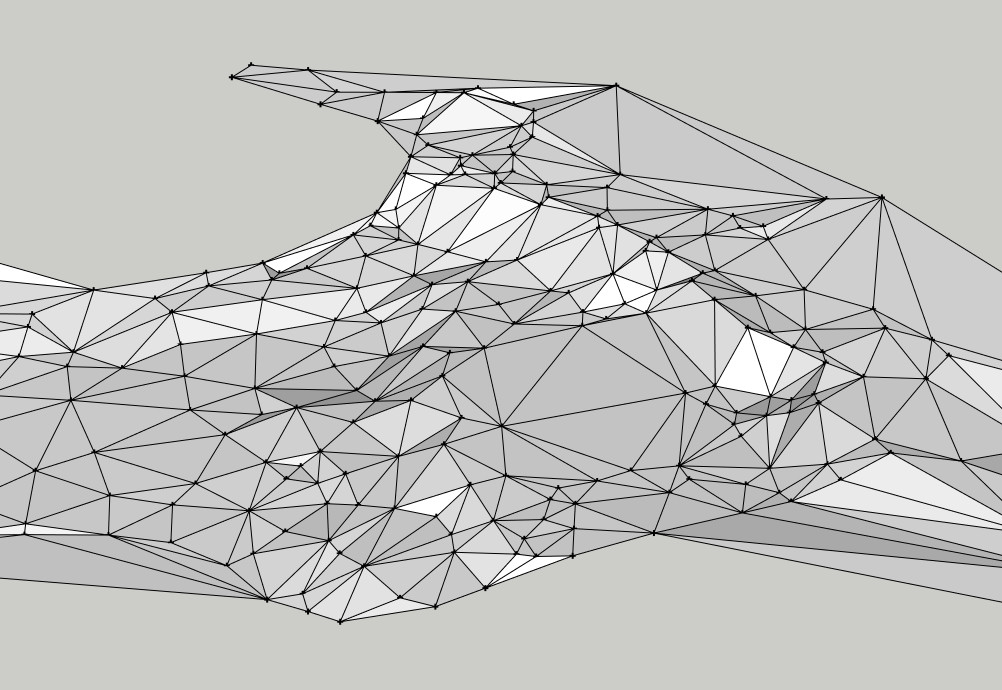
Voila a mesh that can now be smoothed, edited etc!

Sketchup Mesh
Sketchup Mesh


Create Hatch

Bizarrely AutoCAD has not (as far as I am aware) created an easy hatch creation method, preferably in a GUI. This is long, long, long outstanding and should have been introduced back in R14 or earlier. If you want to create a hatch, you have to write it out by hand in a text file (there is no automation either), giving the text file a .pat extension.

Apart from the header row for the name and description of the hatch file, the hatch format is like this:

angle, x-origin,y-origin, delta-x,delta-y,dash-1,dash-2

Each line in the text file describes a drawn line, whether this is solid or dashed. All patterns are made from lines that are dashed or continuous and nothing else (a dot a line with a very short or no length). The dash length is variable so you then build up a hatch patten from a set of dashed lines that intersect. 

In order to create say herringbone brick you have the following pattern text:

0, 0,0, 10,10, 30,-10
90, 20,-30, -10,10, 30,-10

This creates a dashed line one way that intersects with one 90 degrees to it and when they repeat a brick pattern occurs. For such a simple shape it is still quite hard to wrap your head around the way they work!

If a complex hatch is required it is expected of the user to somehow translate their drawings from a set of lines into the hatch format. This is of course nigh-on impossible for most users and for a pattern with over one hundred entities will take forever to measure and write out the results, and the 7 step help file isn’t really that helpful and is quite vague.

This is one my major annoyances in AutoCAD that they fiddle with this and that and don’t fix fundamentally missing features like this!

——

If you are thinking, man I cannot do that, don’t worry if you have the full version of AutoCAD (sorry LT guys) you can install a LISP file to do this for you. The awesome guys at Cadalyst posted in one of their tips a hatch creation LISP.

This LISP has two functions, draw and save. Accessed through DRAWHATCH and SAVEHATCH (strangely enough).

The draw hatch command command creates a 1×1 box in drawing units, so for metric in my case this is a 1x1mm box. Tiny!

——

So this is the process I followed to create my hatch.

Firstly, draw your tessellating hatch inside a square, using only line entities. Make sure no curves are present. Then copy this in all directions to make sure the tessellation works! Save this drawing as your template for the hatch.

Secondly, scale your square down to a 1×1 unit square. You can save this as another file if you want. Leave this drawing open (save first, as always before doing anything major).

Thirdly create a new drawing and run DRAWHATCH. This will create a 1×1 unit square with nothing in it. Go back to your open drawing and copy the entities within the square (you can copy the square for ease and delete it after the copy if you want), and paste inside the square drawn in the new drawing by DRAWHATCH.

Fourthly, run SAVEHATCH and select the line objects (polylines won’t work so explode them first) and follow the prompts. A command line window will appear to make things easier.

Fifthly, give it a description and then save it as a file name in a place where you can load them into AutoCAD. Our practice as a server folder for custom hatches.

So that’s it you now have a hatch. One of the problems I encountered with this method is that the created hatch is very small. You will have to enter a large scale factor to correct this.

——

If you are feeling adventurous, you can load the pattern file into Excel and scale the numbers created up to suit. Save out as CSV to get the comma delimited text file back!